Get Started with FeedBunk AI
For farms in our beta program — everything you need to go from camera to report: download the desktop app, set your camera up, mount it in the barn, and upload your photos. Not onboarded yet? Join the beta.
1 Download the desktop app
The FeedBunk AI Compressor app shrinks your trail-camera photos on your own computer, then uploads them for analysis. It handles SD cards with tens of thousands of images without breaking a sweat.
Signed for Mac and Windows, and tells you when a new version is ready. On Windows, a one-time warning may appear when you first open the installer — here’s how to get past it.
Latest version:
On Windows? Expect one warning the first time
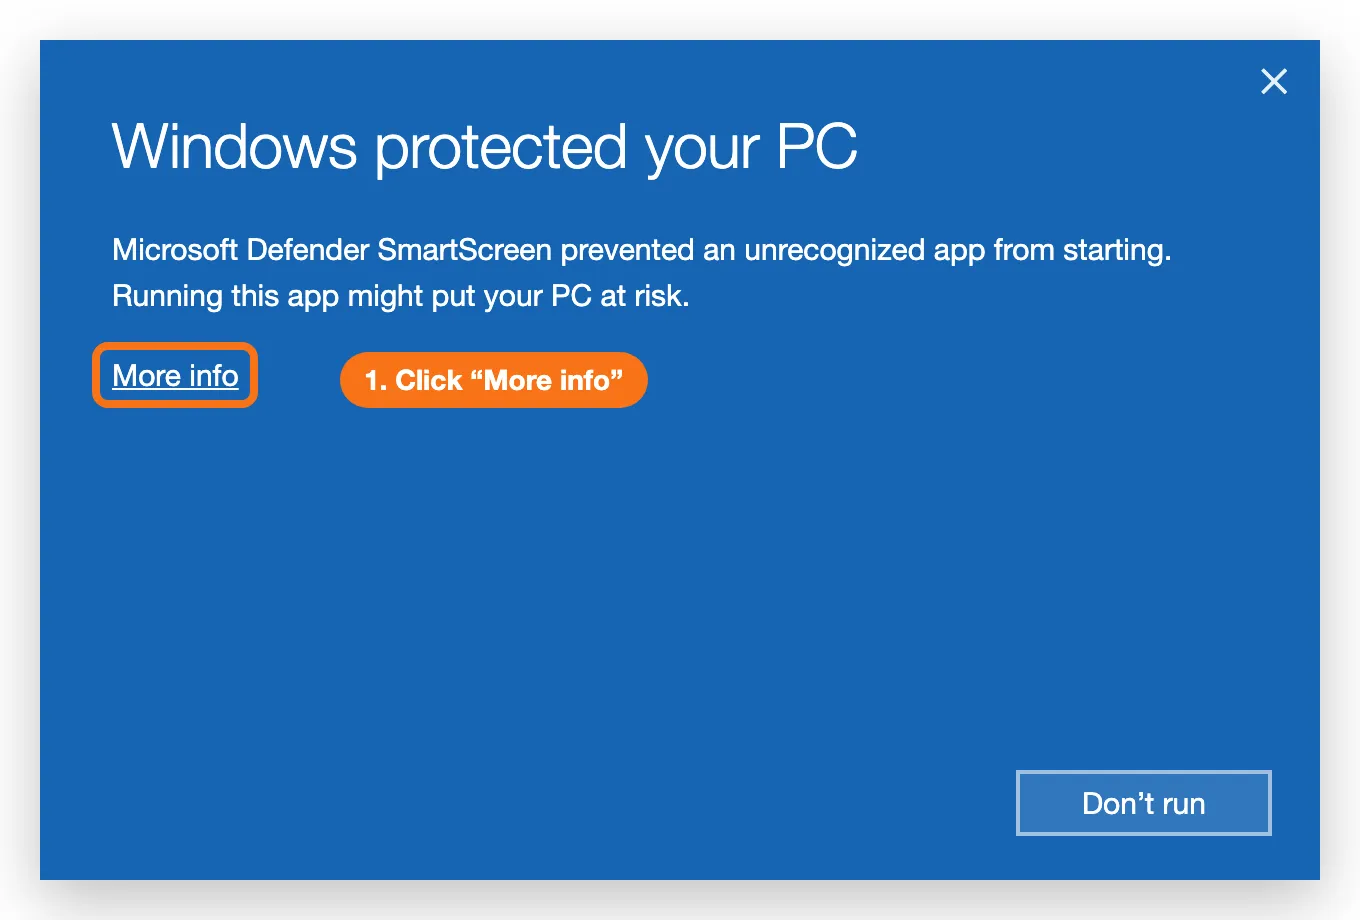
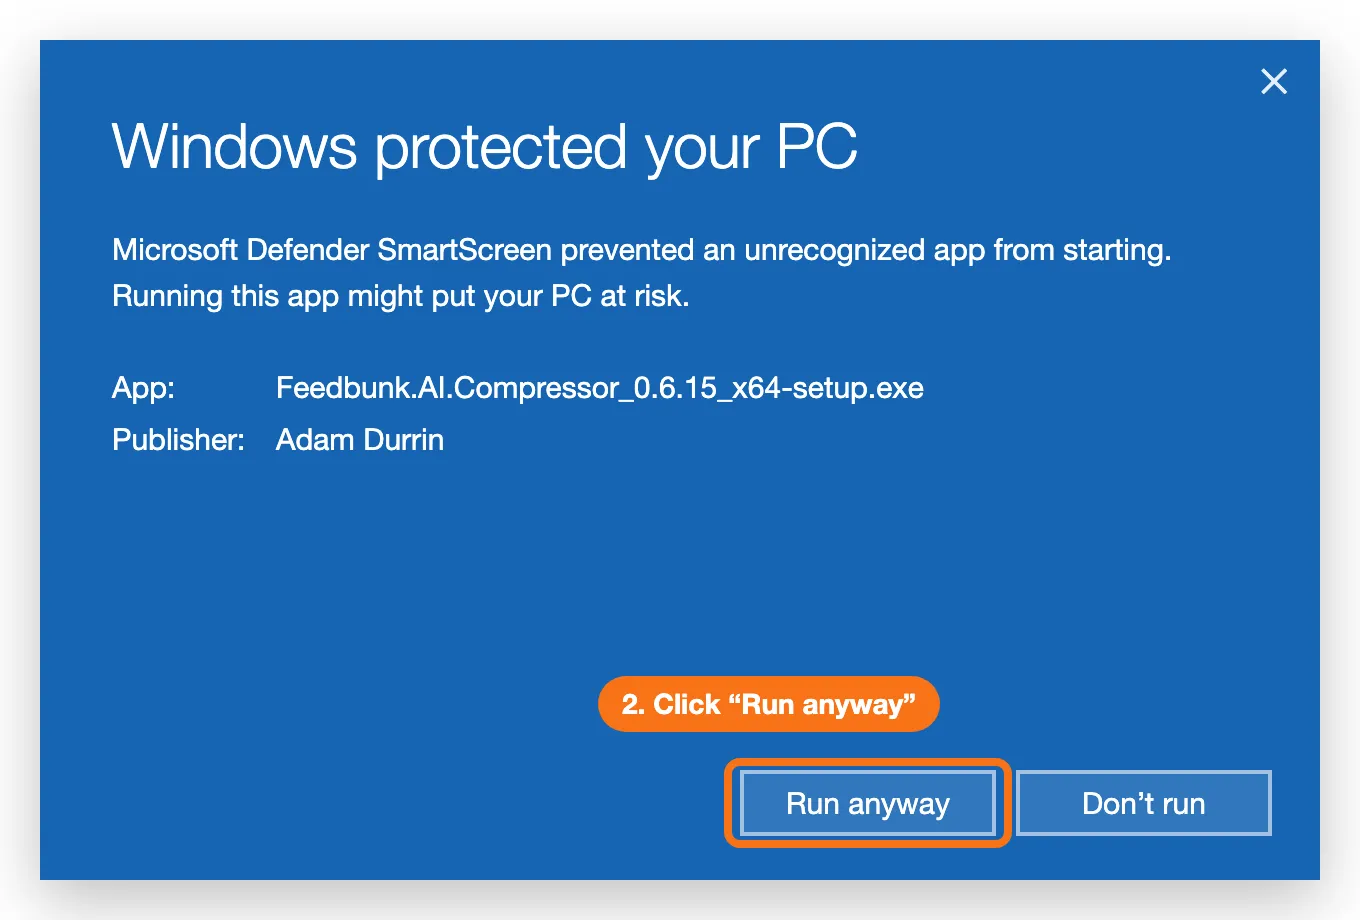
Windows may show a blue “Windows protected your PC” screen when you open the installer. That’s normal for new software, even signed software, and it doesn’t mean anything is wrong. Click More info, then click Run anyway. You only need to do this once.
2 Camera settings
Any trail camera with a time-lapse mode works. Dial in these settings before you head to the barn.
00:00:10.
Leave any “first shot time” or schedule window blank or off — the camera should shoot
around the clock.
3 Set up the camera in the barn
Three steps: settings, placement, start. Ten minutes with a ladder and a strap.
Mount the camera
- Near the beginning of the barn or pen.
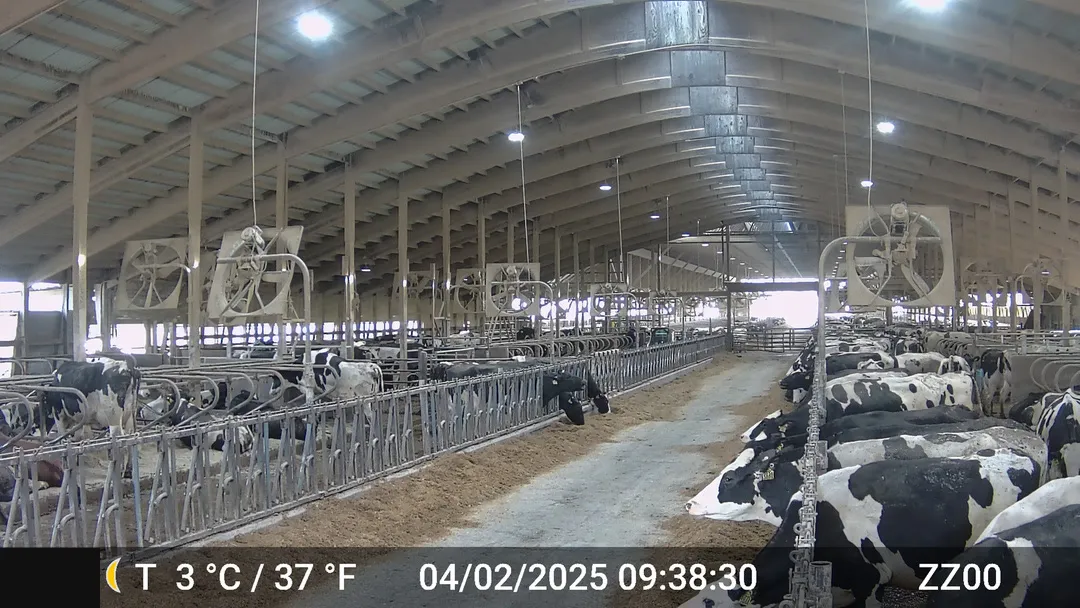
- At least 5 feet high — 6 feet or higher is ideal. Strap it to any vertical pole, post, bar, or fan.
- Aim it down the alley so the opposite feed bunk fills as much of the frame as possible — the close edge of the opposite bunk should stay in frame all the way to the far end of the alley. There’s no exact angle: check the camera’s preview and adjust until you have it.
- Out of reach of cows.
4 Upload with the desktop app
Back at a computer, six steps take you from SD card to finished report.
-
Install & open
Open the file you downloaded. On Mac, drag Feedbunk AI Compressor into Applications. On Windows, run the installer — if a blue “Windows protected your PC” screen appears, click More info, then Run anyway (see the screenshots). The first time the app opens, accept the license agreement.
-
Choose your photos or video
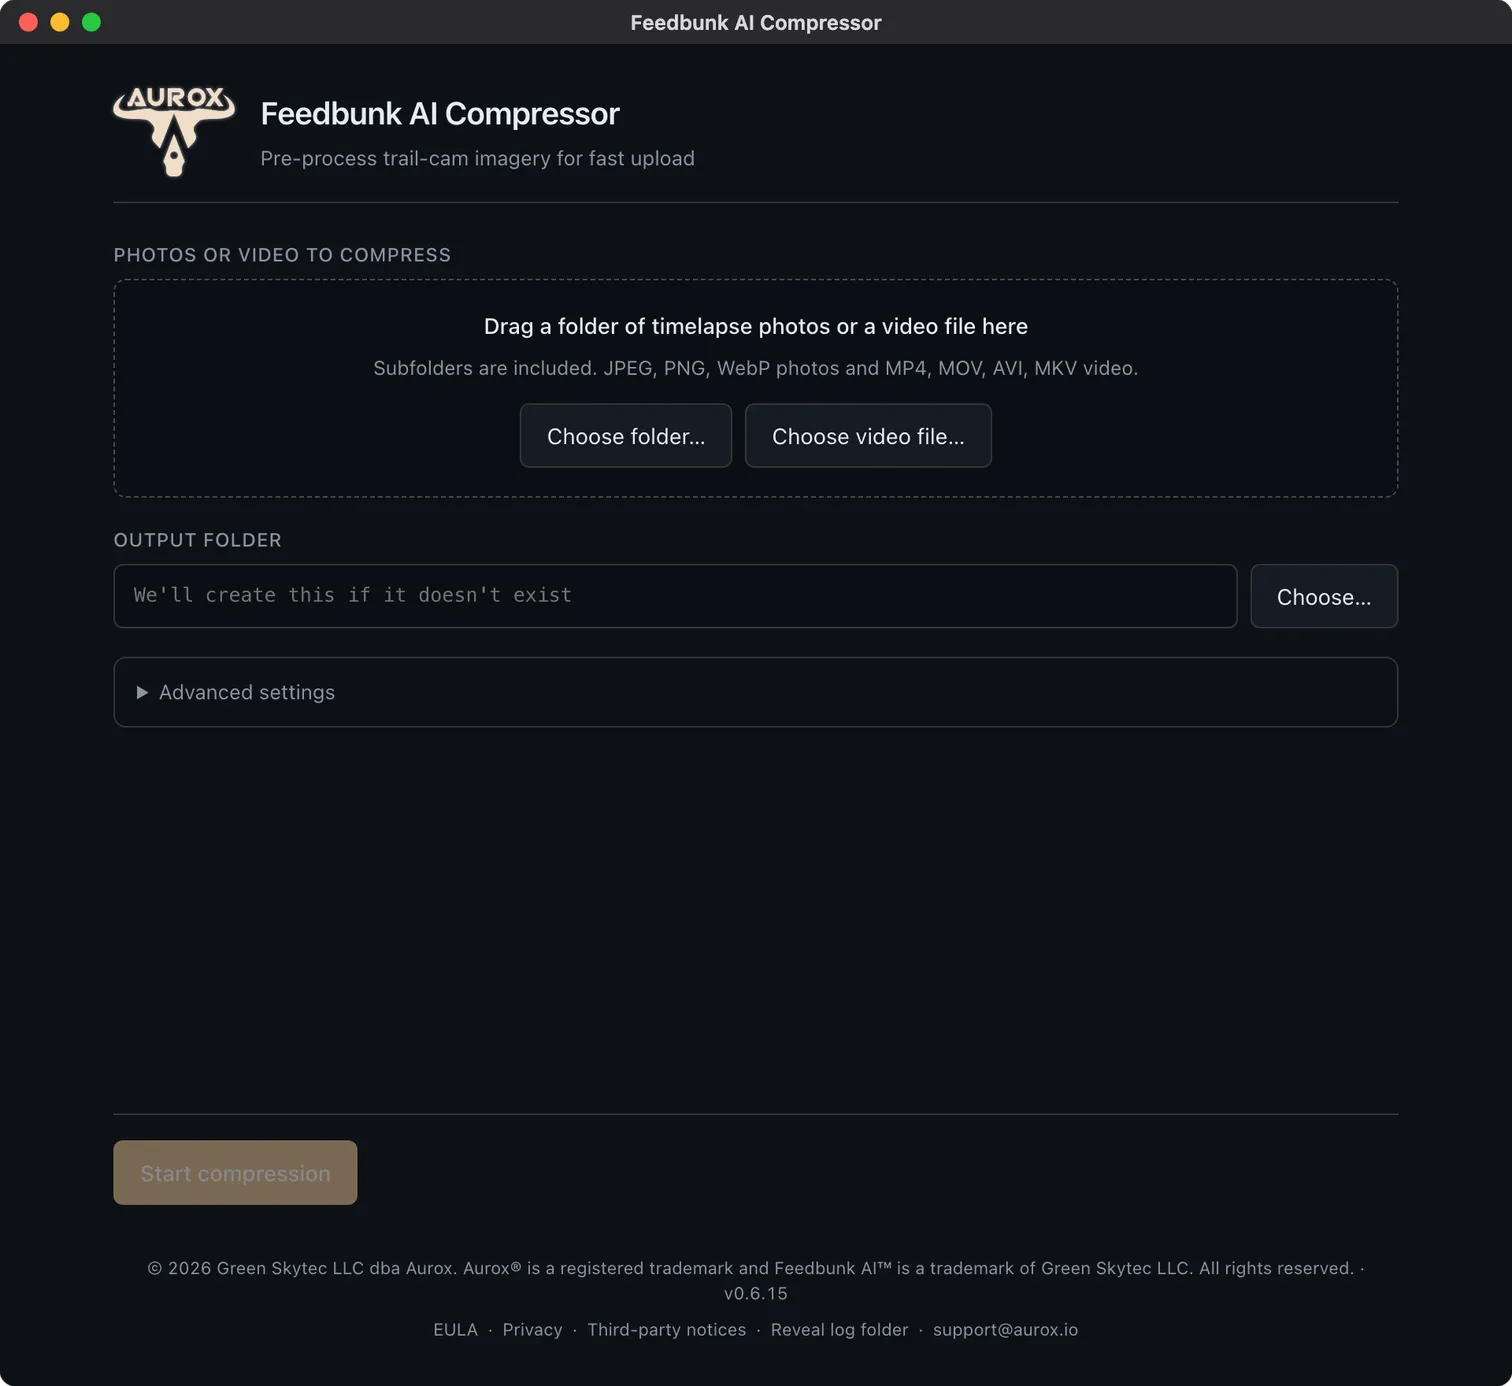
Put the SD card in your computer. Drag the folder with your camera’s photos onto the app, or click Choose folder… and pick it. Recorded a timelapse video instead? Drag the video in, or click Choose video file… and pick it.
-
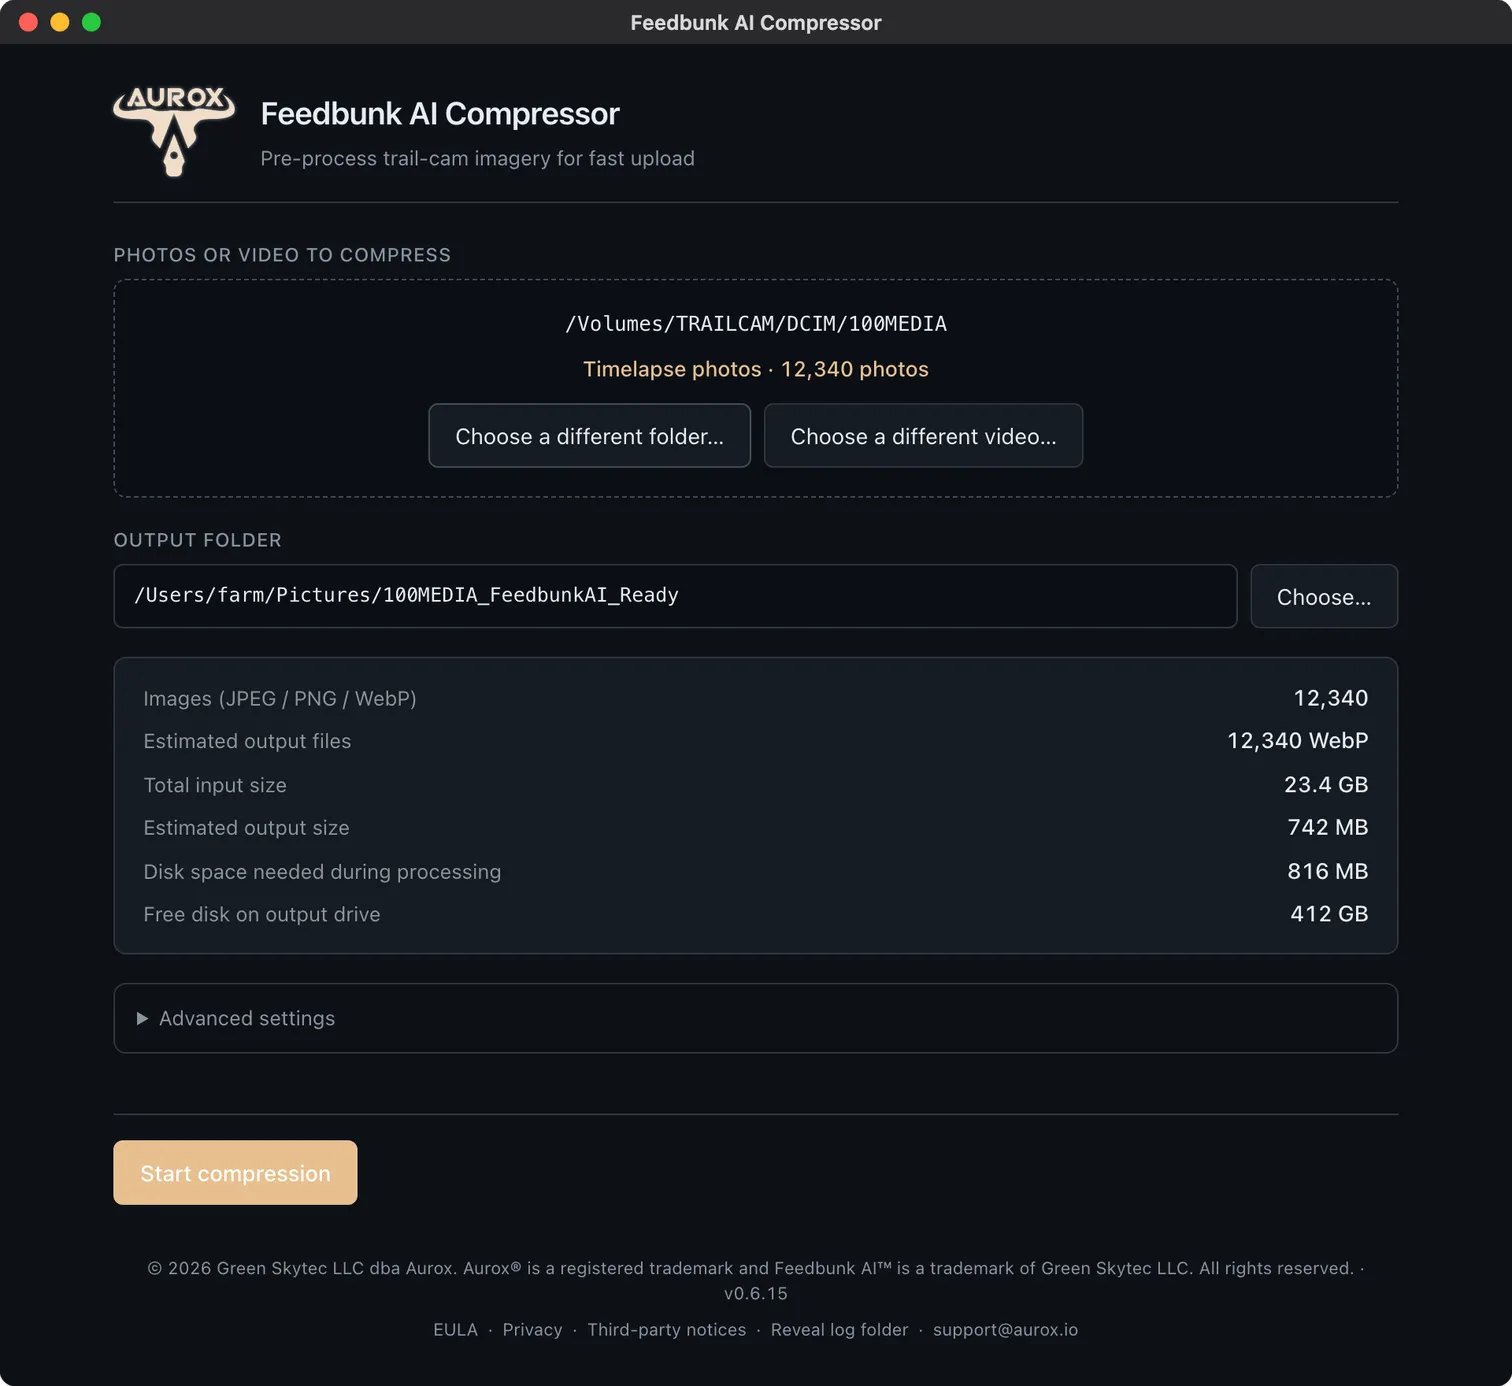
Check & compress
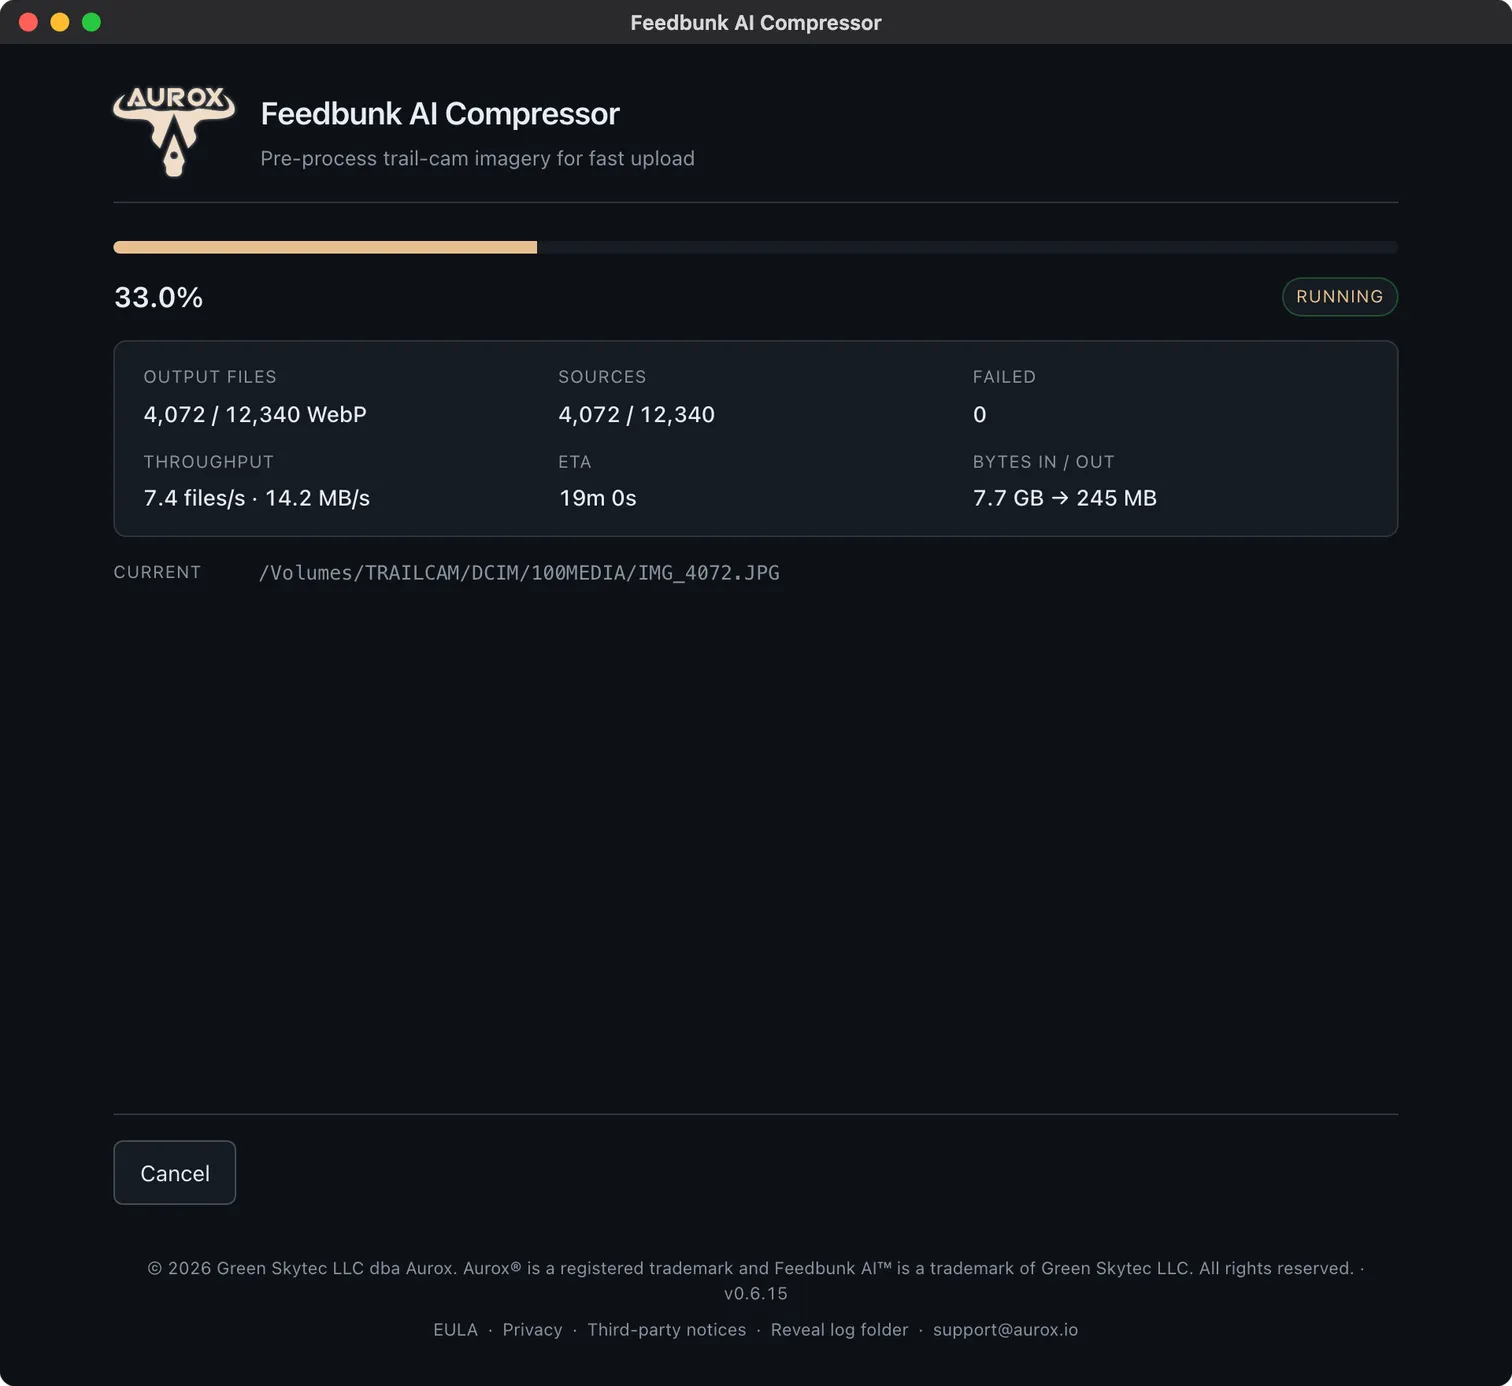
The app shows what it found and suggests an output folder on your computer. Check the numbers, then click Start compression. It shrinks the photos to a small fraction of their original size, keeping the timestamps. It’s safe to close mid-job.
-
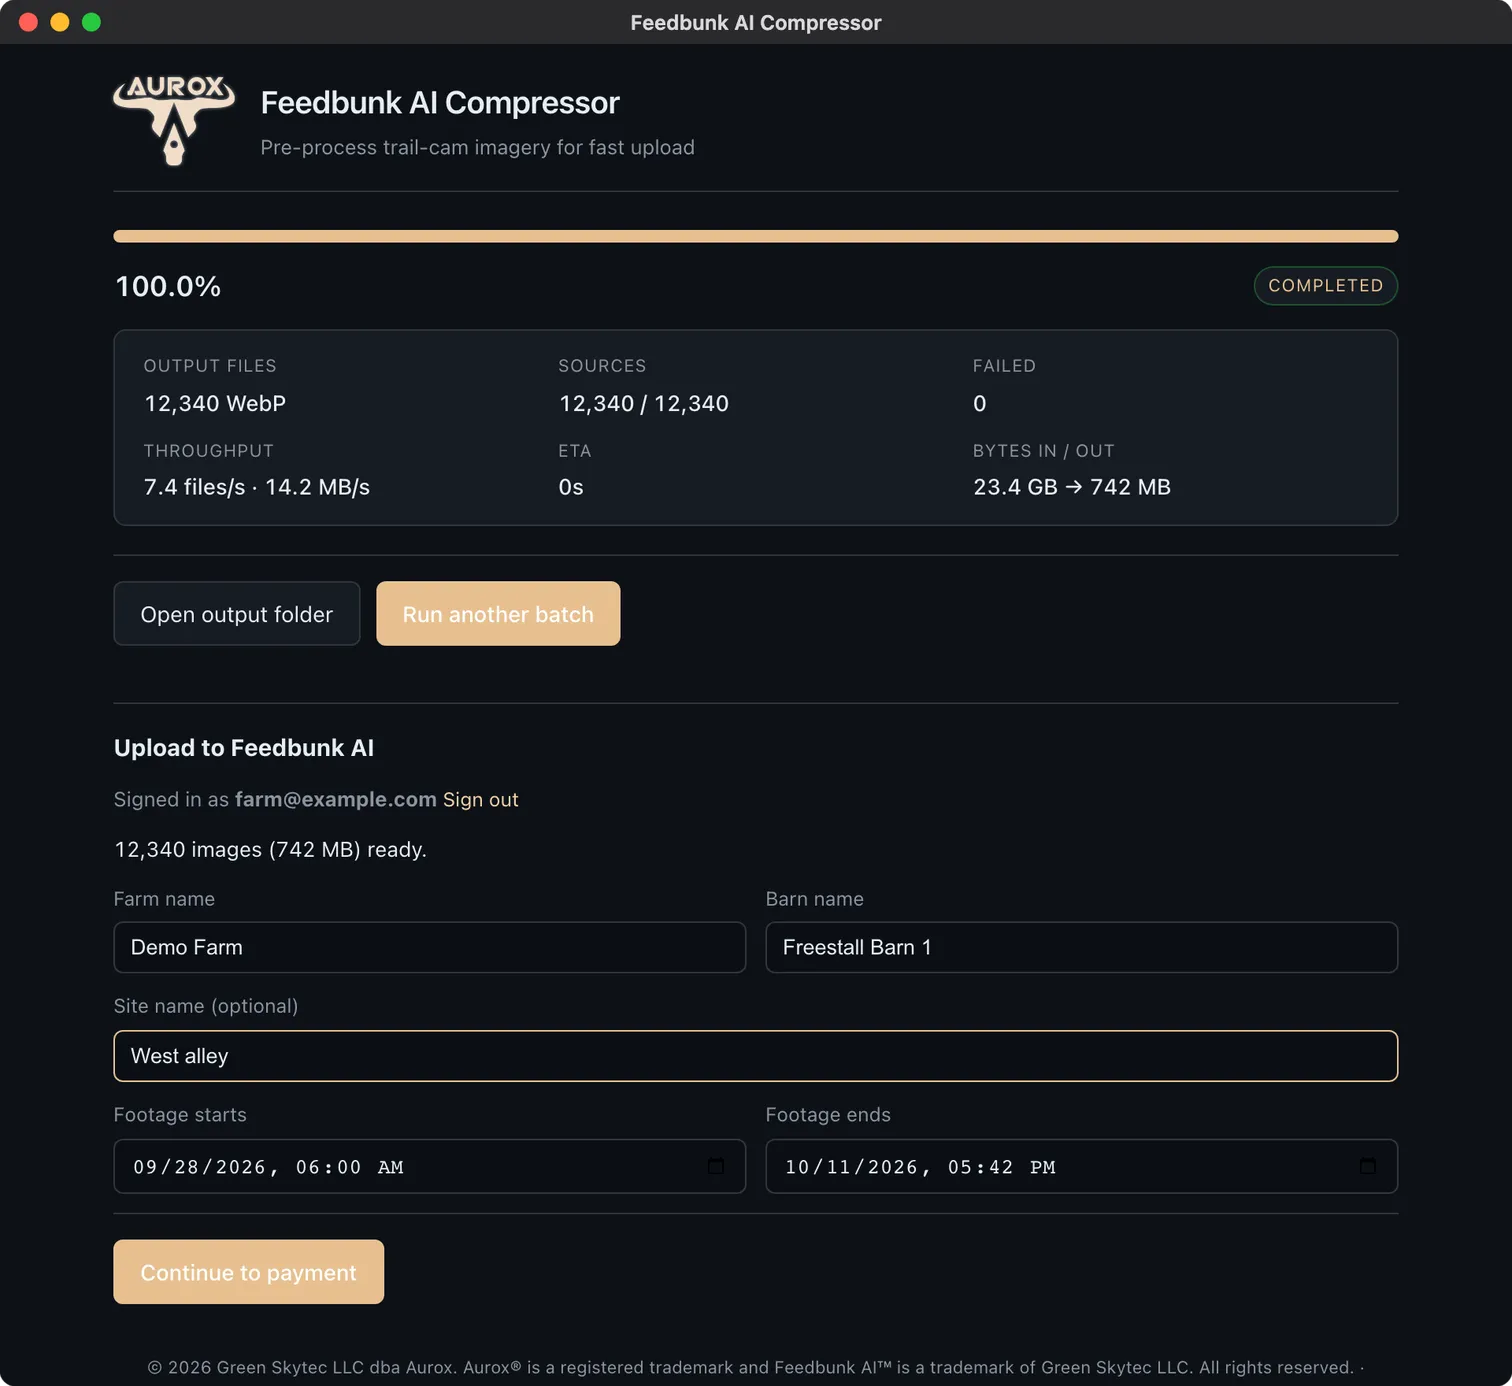
Sign in & add the batch details
When compression finishes, click Sign in in the upload panel and use your FeedBunk AI account — or click Create an account, which opens your browser to register. Enter your farm and barn name. If you’re uploading video, or your photos were taken more than 15 seconds apart, tick the box to confirm your camera’s capture interval.
-
Confirm & upload
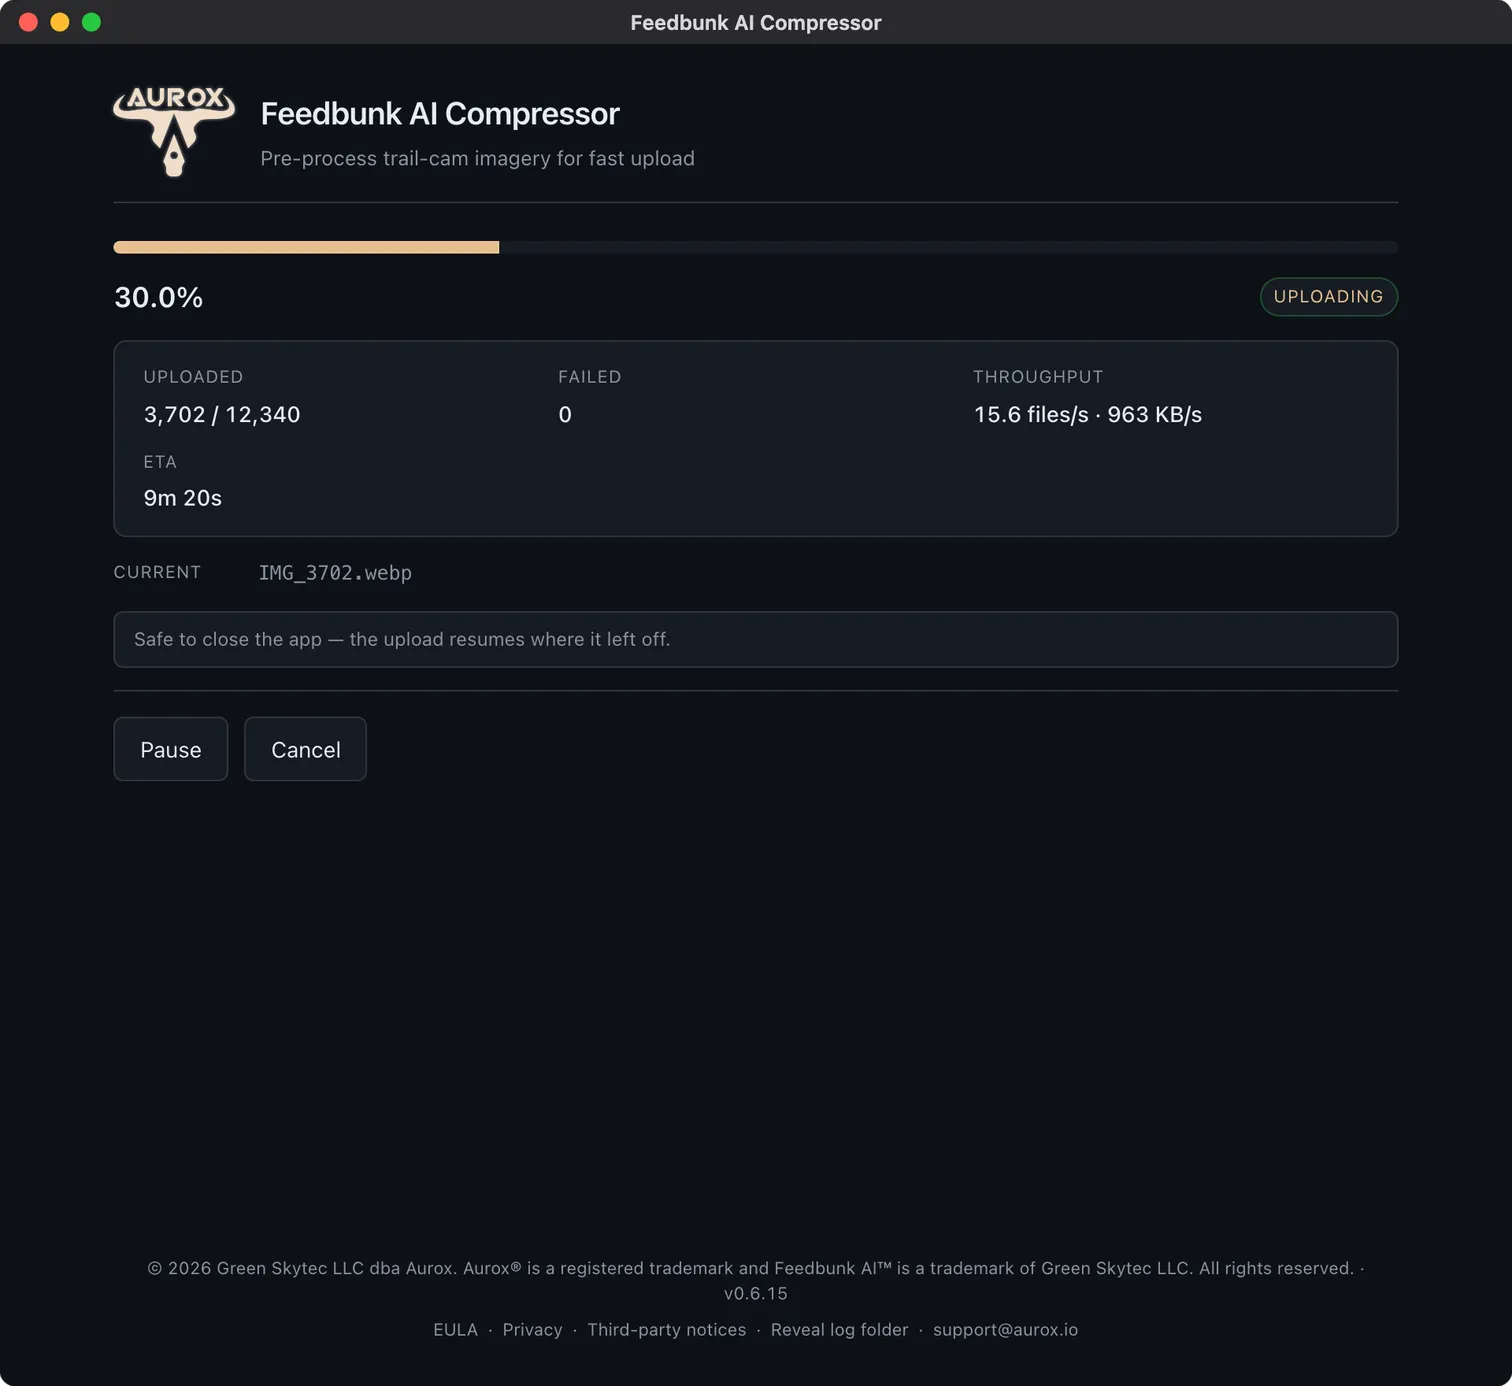
Click Continue to payment and confirm the batch — nothing uploads until you approve it. While it uploads, the app asks you to mark the four corners of your feed bunk on one photo, or you can skip that for now. Uploads are resumable, so a dropped connection never means starting over.
-
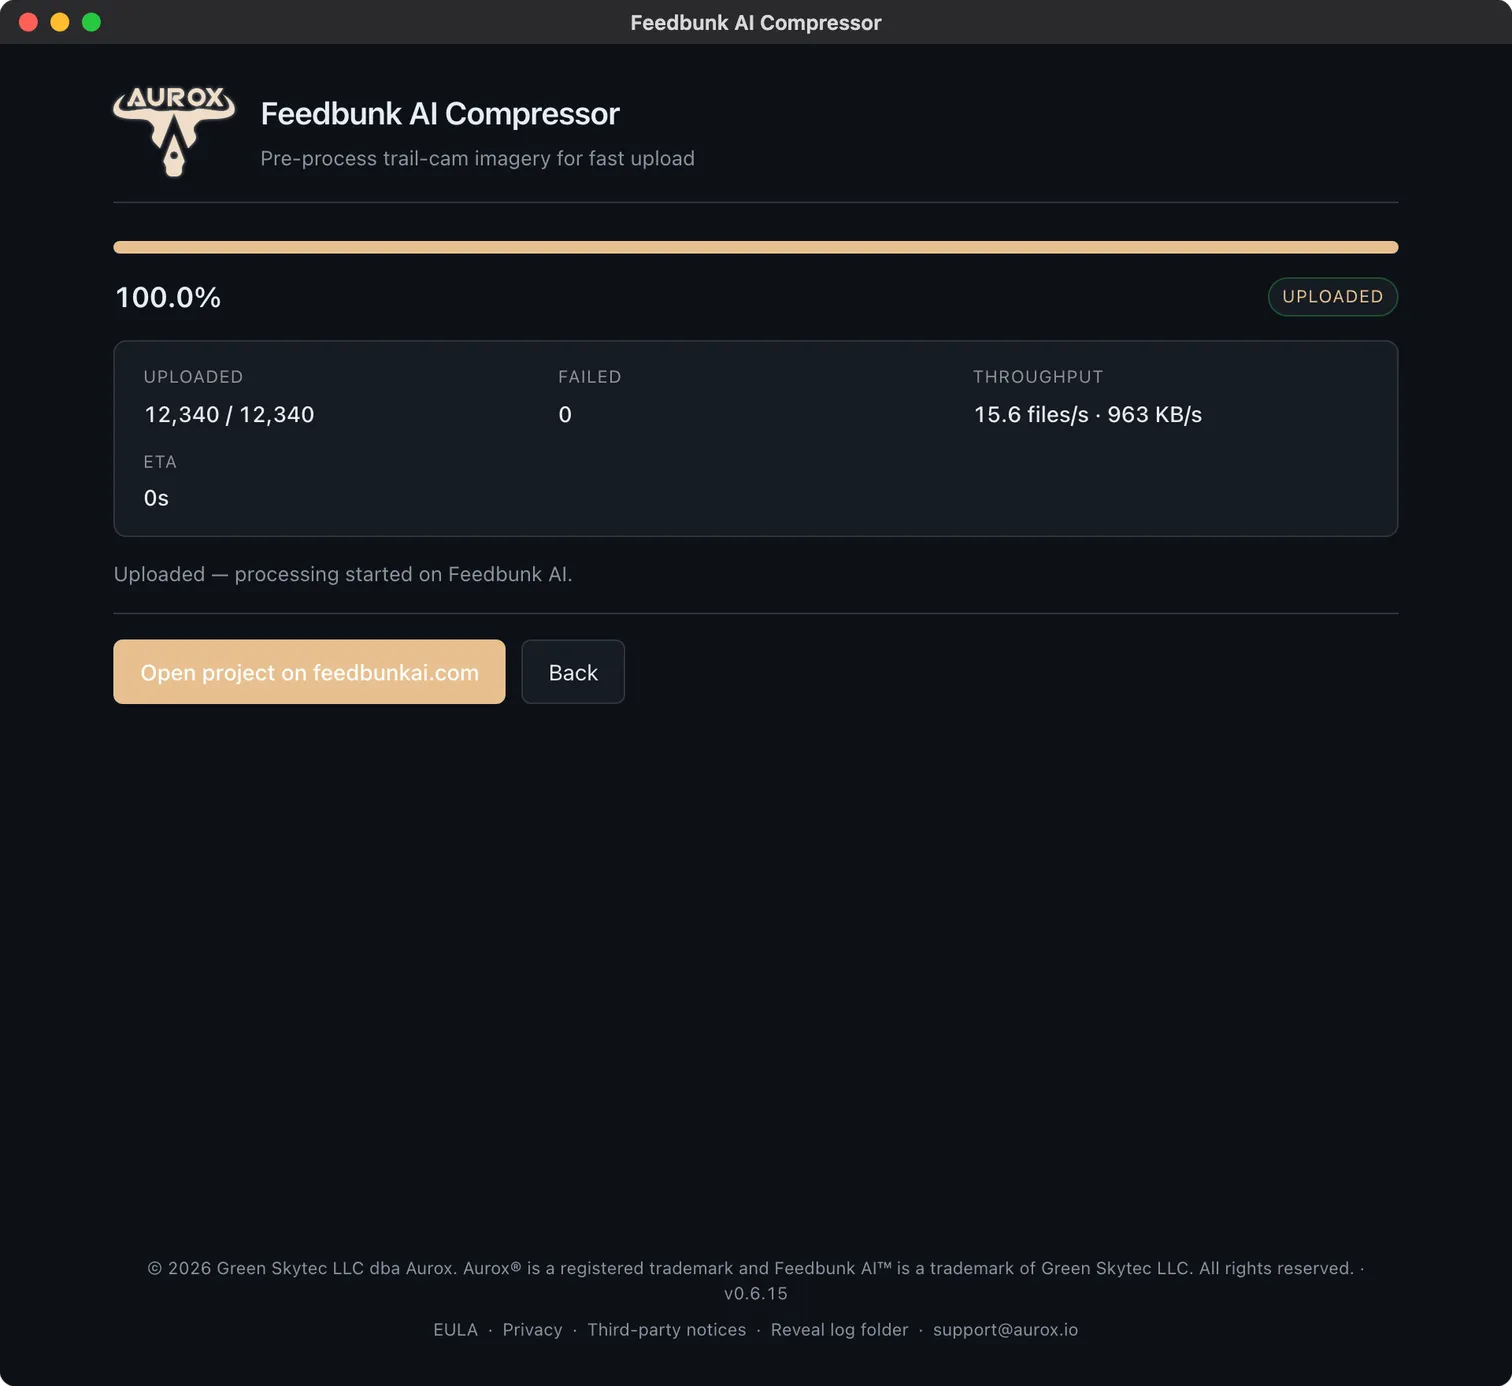
Get your report
When the upload finishes, click Open project on feedbunkai.com. Your report appears on the project page once processing is done.
Do I need to update the app?
Only when it asks. Each time you open the app, it checks for a new version. If there is one, click Install & relaunch and the app updates and reopens.
What happens if compression or upload is interrupted?
Nothing is lost. You can close the app any time. To carry on, open it and choose the same output folder: compression skips what is already done, and an unfinished upload offers Resume upload.
Need help?
Browse the Help Center for step-by-step guides on the camera, the app, and reading your report — or email [email protected] and we’ll get back to you.