Put the SD card in your computer and open the Compressor. You do not need to copy the photos off the card first — the app reads straight from it.
Step 1: Choose your photos or video
The top of the main screen reads Photos or video to compress. Drag the folder holding your camera’s photos onto the app, or click Choose folder… and pick it. On an SD card this is usually inside DCIM — a folder with a name like 200TLCPR.
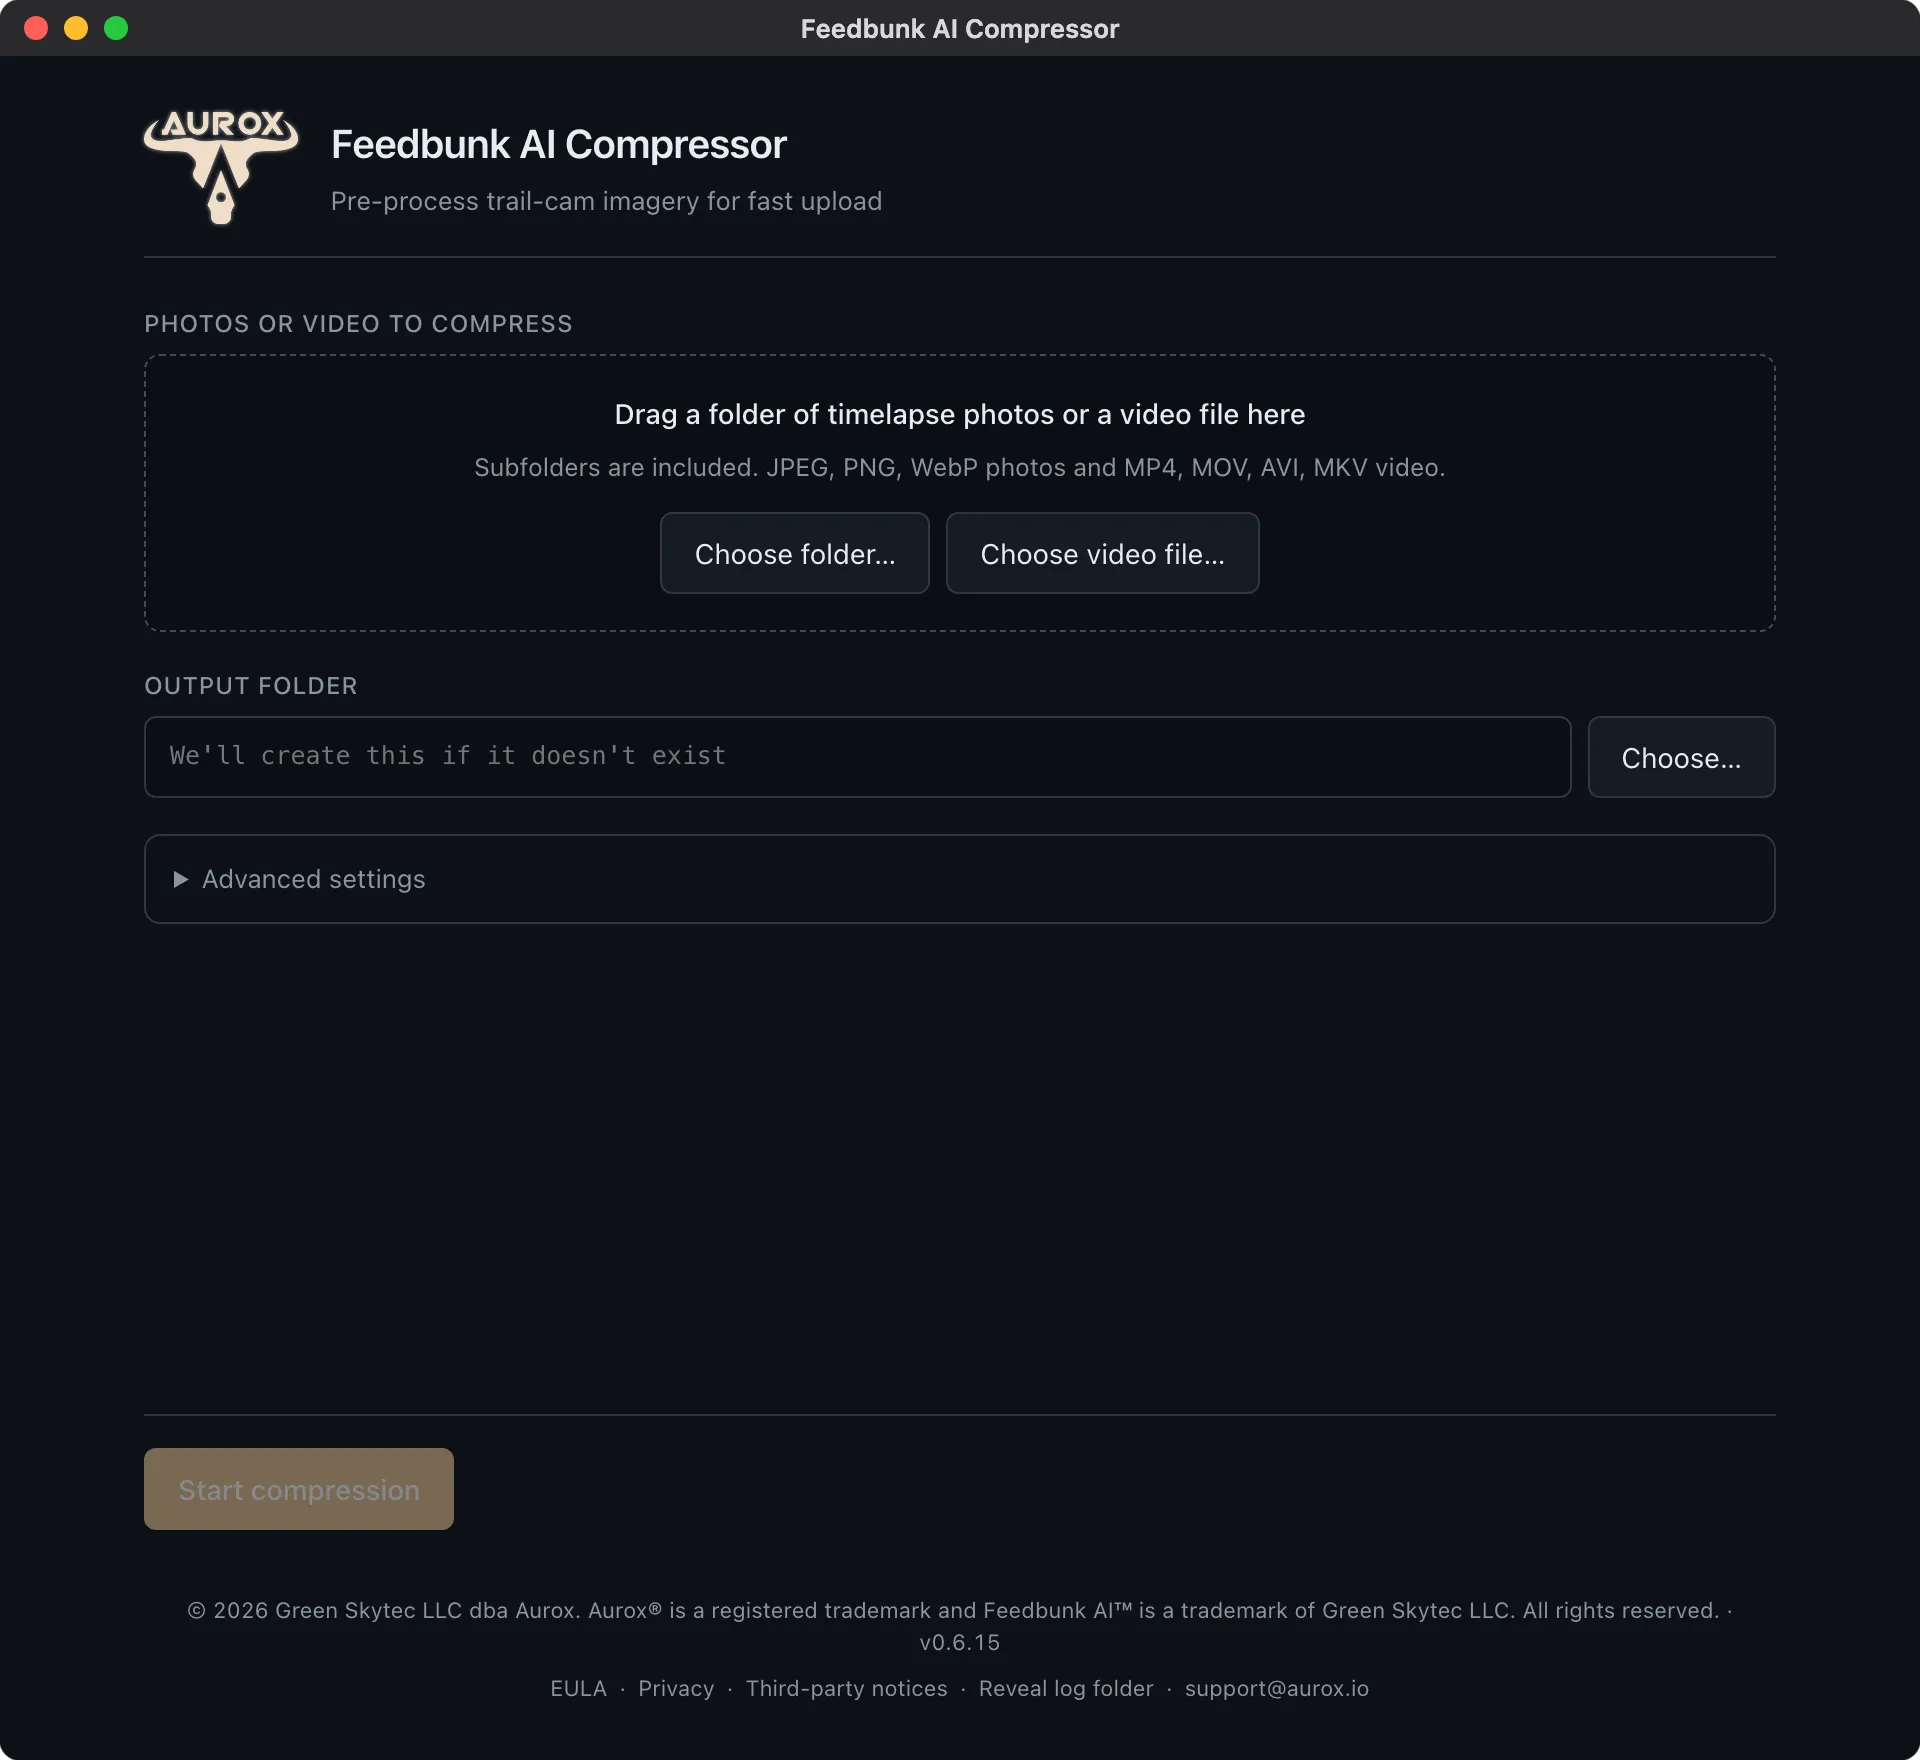
The app looks through subfolders too, so if your camera splits photos across several folders you can point it at the parent and it will find them all.
If your camera records video rather than stills, drag the video file onto the app instead, or click Choose video file… and pick it. The app pulls the individual frames out of the video for you.
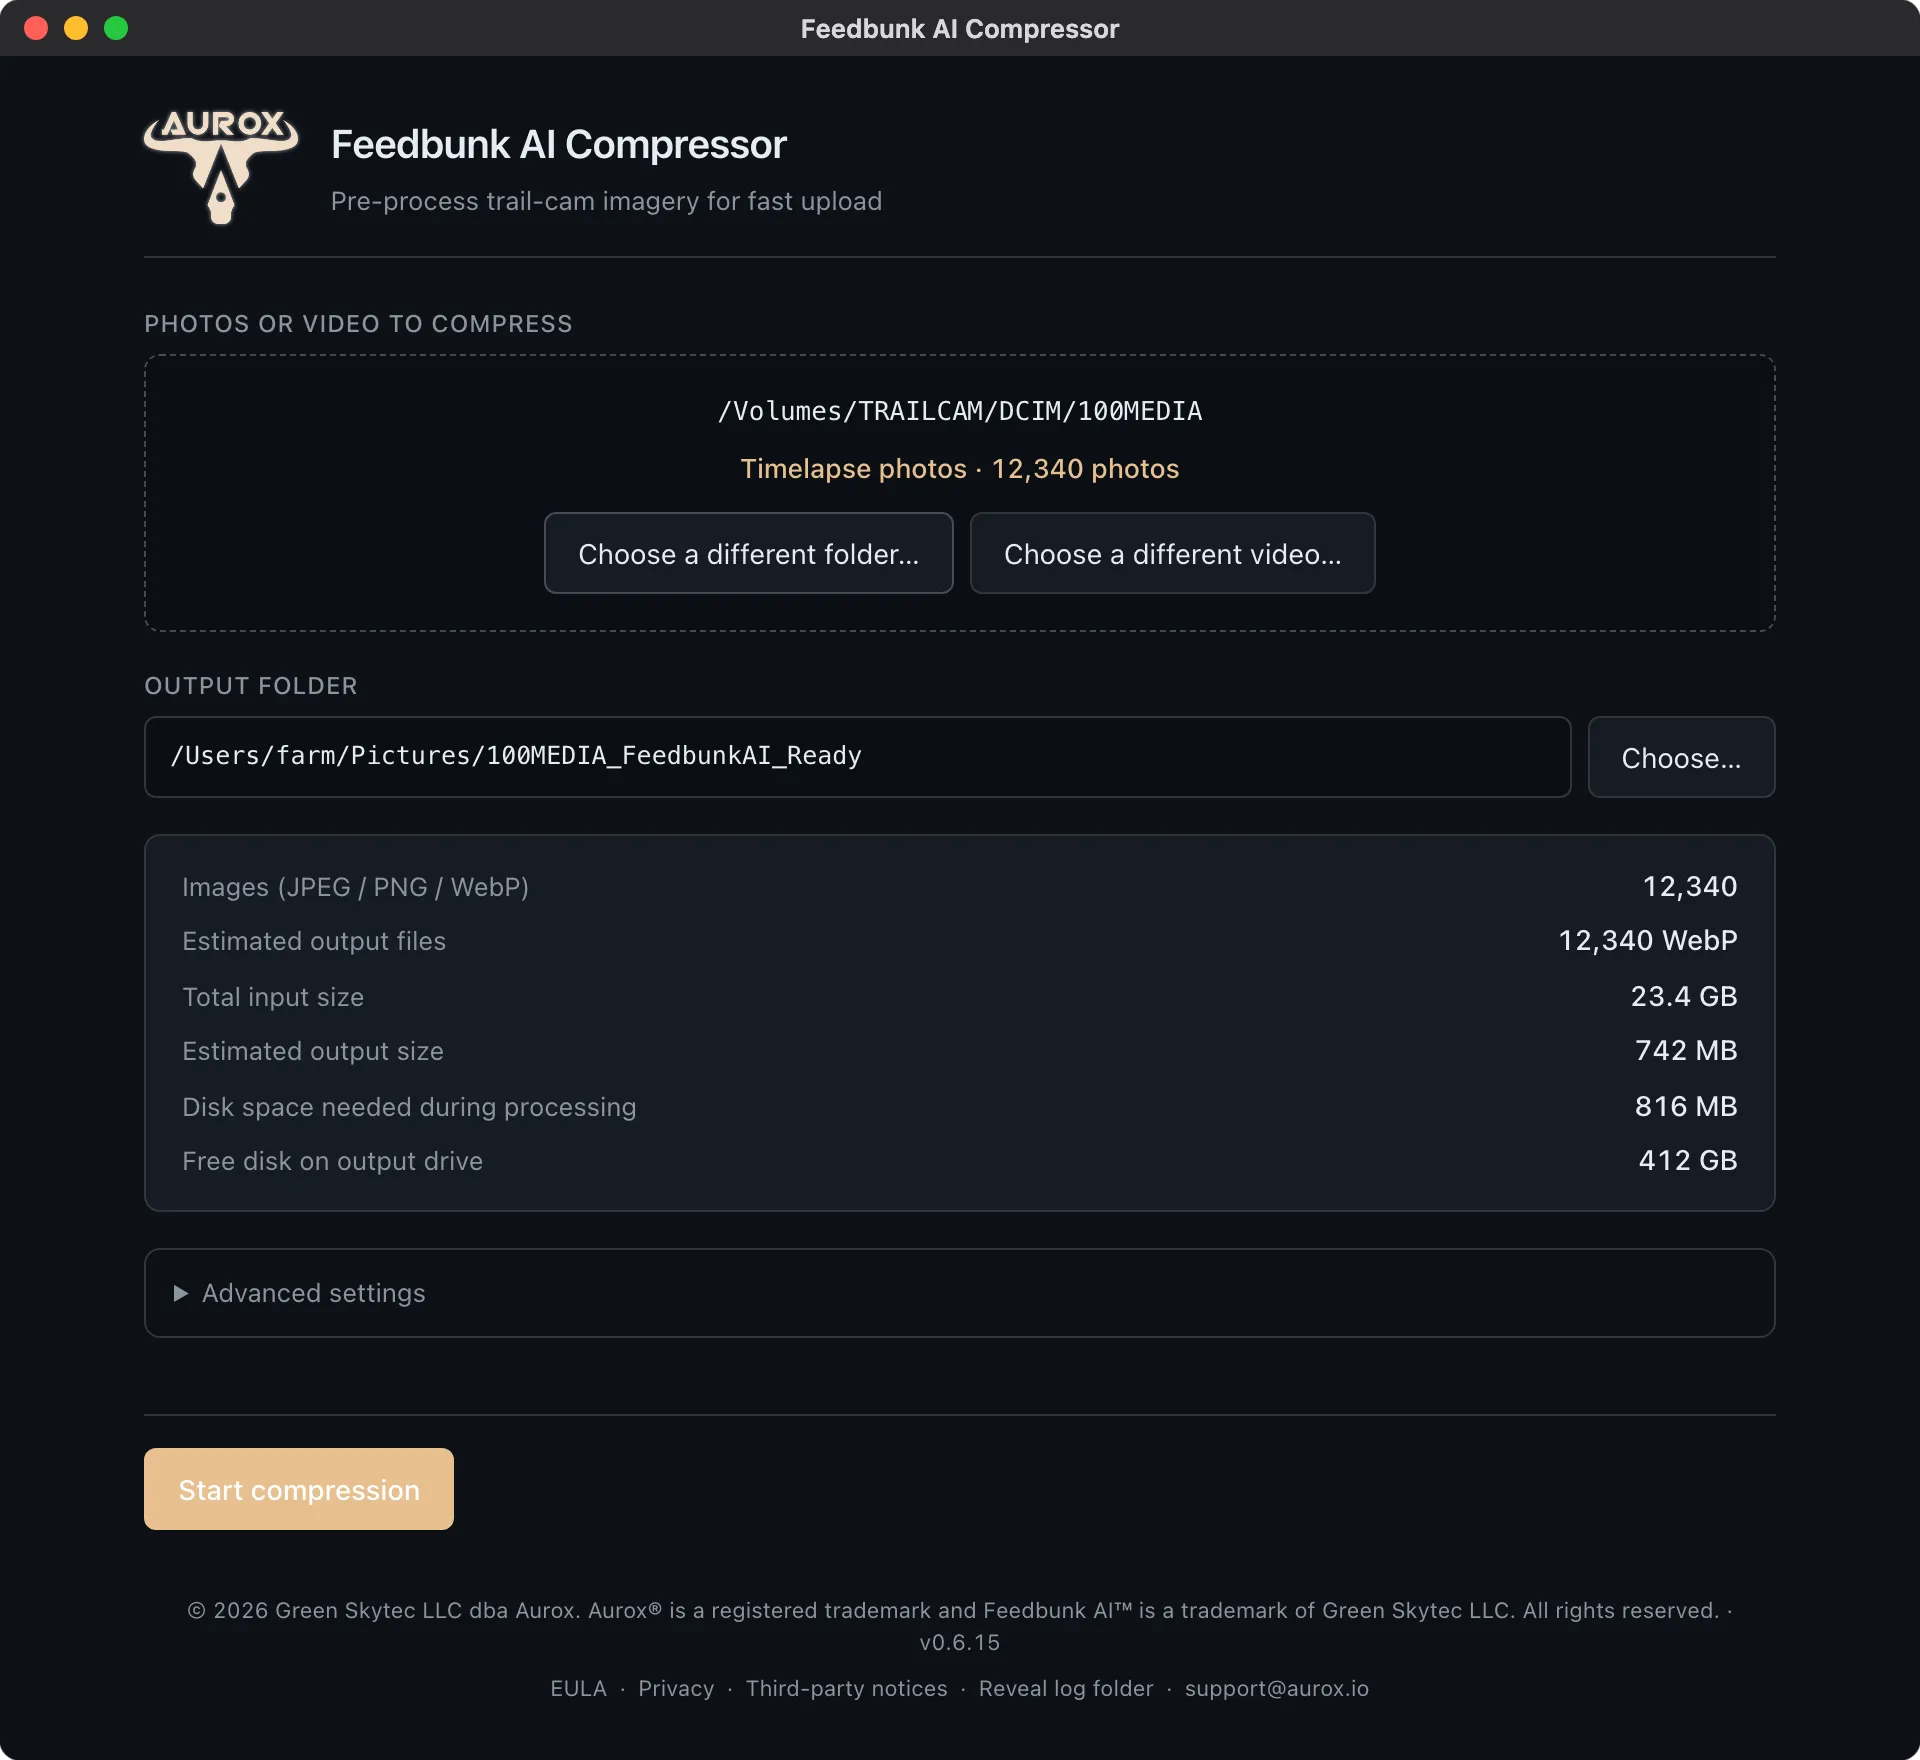
Once it has looked through your choice, the app shows what it found under the path — for example Timelapse photos · 12,340 photos or Timelapse video · 4m 48s. To change your mind, click Choose a different folder… or Choose a different video… and pick again.
Step 2: Check the output folder
The app suggests an output folder automatically, named after your source — something like 200TLCPR_FeedbunkAI_Ready. If your photos are on an SD card that is nearly full, it suggests a folder in Pictures on this computer. If the card has plenty of room, the folder goes right next to your photos, on the card.
Check the Output folder box before you start. The output belongs on your computer’s drive, not on the SD card. If it points at the card, click Choose… and pick a folder on your computer. See Choosing an output folder and free disk space.
Step 3: Read the scan summary
Before it starts, the app scans your folder and tells you what it found:
- How many images and how many videos
- How many frames it will pull out of any videos
- How many output files to expect
- Total size in, estimated size out
- Disk space needed during processing
- Free disk on output drive
This is your chance to catch a mistake. If the image count is far lower than you expected, you may have pointed at the wrong folder, or the card may have filled up mid-run.
Files stored in the cloud
If some of your photos live in OneDrive or iCloud and have not actually been downloaded to the computer, the app says so and skips them. To include them, right-click the folder and choose Always keep on this device (OneDrive) or Download Now (iCloud), wait for them to download, and run the scan again.
Step 4: Start
Click Start compression. If the output drive does not have enough free space, the job does not start — the app says how much it needs and how much is free, so pick a folder on a drive with more room and click Start compression again.
Once it is running you will see a progress bar with the percentage, how many files are done out of how many are expected, the speed it is running at, an estimated finish time, and the file it is working on right now. Anything it cannot read is listed as an error rather than stopping the job.
For a video, the Current line first reads Extracting frames from … with a running count, and the bar fills to about halfway before the frames are converted. A long video can take a while on an older computer. If the count is climbing, it is working.
The app uses all your computer’s processor cores, so it will be busy while it runs. It is fine to leave it and come back.
You can close it mid-job. To pick up again, choose the same photos, then click Choose… next to Output folder and pick the folder from last time. The app skips the files it already finished. If you leave the new suggestion in place instead, it starts again from scratch in a fresh folder.
If you cancel a job that has already processed a lot of files, the app warns you that finished files stay in the output folder but the rest will not be processed until you run it again.
What comes out
Photos come out as WebP images at 1280×720, with the original capture time preserved exactly. That is the same size and format our servers use, so nothing extra is lost when they arrive.
Everything is written flat into the one output folder. If your source had subfolders, those names become part of the filenames so nothing collides.
Advanced settings
There is a collapsed Advanced settings section with Quality, Max width, Max height, Video interval, a “force re-process every file” option, and a Feedbunk AI API URL box. As the app itself notes, Defaults match Feedbunk AI’s server pipeline (1280×720, quality 90).
Leave these alone, including the API URL. Changing them does not improve your results and may make photos we cannot use. The one that is occasionally worth touching is the video interval, and only if you are extracting from a very long video — 0 = auto takes every frame.
Next
When it finishes you get an Open output folder button, a Run another batch button, and the upload panel. Carry on with Upload straight from the app.